

October 15, 2025
Few household problems interrupt daily life faster than a surprise cold shower. The moment it happens, panic can lead to guesswork—or to a simple, methodical approach that fixes the issue quickly and safely. That second path is what this guide is for. Written on behalf of AOBUTEC – HVAC, it shows you how to approach water heater troubleshooting step by step, whether you have a gas, electric, tank, or tankless unit. We’ll separate quick homeowner checks from tasks best left to licensed technicians, explain what the symptoms mean, and share practical maintenance habits that prevent repeat failures.
If you only remember one idea, make it this: good water heater troubleshooting moves from the easiest, safest checks to deeper diagnostics in a logical order. Doing so protects your equipment, saves time, and keeps you from creating new problems while trying to solve the original one.
Safety first: what to do before any water heater troubleshooting
Shut off power to electric units at the breaker panel before removing covers. For gas models, turn the gas control to the “off” position if you smell gas or see scorch marks. Let scalding water cool before opening any tank drain. If you are unsure about a step, pause and call a professional. No hot water is an inconvenience; unsafe work is a hazard.
How water heaters make hot water (and why that matters)
At a basic level, water flows into the heater, is heated by an electric element or a gas burner, and leaves through the hot outlet line. A thermostat and safety devices regulate temperature, while pressure and temperature relief valves protect the tank. Tankless models heat water on demand as it passes through a heat exchanger. Knowing this sequence helps you frame water heater troubleshooting as a set of simple questions: Is there power or gas? Is ignition or the heating element working? Is water flow adequate? Is temperature set correctly? Is there a safety device tripping for a reason?
Typical symptoms and what they usually mean
No hot water at all
Common causes include tripped breakers (electric), failed heating elements or thermostats, extinguished pilot or ignition fault (gas), closed gas valve, or a safety lockout. The first stage of water heater troubleshooting is to confirm energy supply, thermostat setting, and obvious safety trips.
Not enough hot water or runs cold too fast
This often points to a failed element (on dual-element electric units), sediment that insulates the burner from the water, a thermostat set too low, a mixing valve problem, or an undersized heater relative to your demand. For tankless units, low gas supply or flow restrictions are frequent findings in water heater troubleshooting.
Water too hot
Likely a mis-set thermostat, failed thermostat in an electric unit, or a mixing valve not balancing properly. Overly hot water is a scald risk; treat this water heater troubleshooting case as a priority.
Water temperature fluctuates
Tankless heat exchangers can “hunt” if minimum flow is not met or filters are clogged. In tank models, pressure changes or a failing dip tube can create inconsistent temperatures. This is a common water heater troubleshooting scenario in older homes.
Strange noises: popping, rumbling, whistling
Popping or rumbling is usually steam bubbles under sediment; whistling can be pressure or a partially closed valve. These sounds are valuable clues during water heater troubleshooting, telling you where to look first.
Leaks or water around the base
Could be a loose drain valve, a weeping temperature/pressure relief valve, a corroded tank, or fittings that need resealing. Leak-related water heater troubleshooting should start with identifying whether the source is a valve or the tank itself. A rusted-through tank means replacement, not repair.
Discoloured water or odour
Brown water can indicate rust; rotten-egg smell may be a reaction between anode material and minerals. These water heater troubleshooting clues point to flushing, anode changes, or bacterial treatment as solutions.
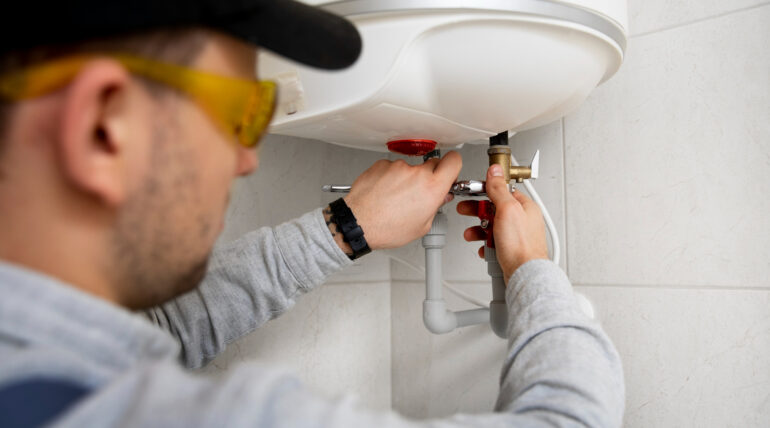
The step-by-step checklist: water heater troubleshooting for electric tanks
Confirm power and settings
Thermostat and breaker check
• Verify the dedicated breaker is on. Reset if tripped.
• Set thermostat(s) to 49–54°C (120–130°F). Many models have upper and lower thermostats; both must be in range.
High-limit reset
• Turn off power at the breaker.
• Remove the upper access panel and insulation carefully.
• Press the red reset button on the upper thermostat. If it clicks and restores heat, monitor operation. Frequent trips require deeper water heater troubleshooting.
Element and thermostat continuity
Basic electrical test
• With power off and wires removed, a multimeter can check element resistance. Elements that read open need replacement.
• Thermostats that do not pass continuity tests when calling for heat should be replaced.
Note: If you’re uncomfortable with meters, this phase of water heater troubleshooting is a good point to call AOBUTEC – HVAC.
Sediment and performance
Flush the tank
• Turn off power, attach a hose to the drain valve, open a hot water tap, and drain until clear.
• Refill fully and purge air before restoring power.
Regular flushing reduces future water heater troubleshooting by preventing insulating sediment layers.
The step-by-step checklist: water heater troubleshooting for gas tanks
Confirm gas supply and controls
Gas valve and pilot/ignition
• Ensure the gas shutoff valve is parallel to the pipe (open).
• Follow the lighting instructions on the unit. If the pilot won’t stay lit, water heater troubleshooting shifts to thermocouple/thermopile or ignition module checks.
Vent and combustion air
• Confirm vents are clear of nests or debris.
• Check for adequate combustion air—many closets starve units of oxygen. Poor venting or air supply causes frequent lockouts and should be corrected by a pro.
Burner condition and flame quality
Visual inspection
• A stable, mostly blue flame is healthy. Yellow tipping or lifting flames can mean dirty burners or incorrect gas pressure.
• Soot or scorch marks are warning signs; escalate water heater troubleshooting to a licensed technician.
Sediment and energy loss
• Drain a few litres from the tank; excessive sediment suggests a full flush.
• Persistent rumbling after flushing indicates heavy buildup and may accelerate tank wear.
The step-by-step checklist: water heater troubleshooting for tankless units
Minimum flow and filters
Inlet screens and aerators
• Clean inlet water filters at the heater and faucet aerators.
• Many “no hot water” calls on tankless units resolve here—an easy win in water heater troubleshooting.
Gas supply and venting
Sizing and pressure
• Tankless heaters need high gas flow. If other appliances are running, supply pressure can sag.
• Incorrect venting length or configuration can cause errors; this water heater troubleshooting item belongs with a professional for measurement and correction.
Temperature setting and mixing valves
Avoid scalds and cold swings
• Set outlet temperature near 49–54°C and adjust mixing valves to suit.
• If the heater “hunts” during low-flow draws (handwashing), increase the flow slightly or discuss recirculation options with AOBUTEC – HVAC.
Quick wins before you call for help
- Check the breaker or fuse and the on/off switch near the heater.
- Verify thermostat settings and try a modest bump upward.
- For gas, confirm the shutoff valve is open and re-light the pilot per instructions.
- Clean faucet aerators; restore flow so the heater sees demand.
- Flush a few litres from the drain to assess sediment.
- Inspect the temperature/pressure relief discharge pipe for signs of intermittent discharge.
- Look and sniff for gas or scorch—if present, stop and call a pro.
- Photograph the rating plate (model and serial). It speeds parts and support.
- Time how long hot water lasts. That duration helps target water heater troubleshooting efficiently.
- Note error codes on digital displays before resetting.
Temperature, scalding, and code basics in Canada
Canadian guidance generally recommends setting water heaters around 49°C (120°F) to balance scald risk and bacterial control. Dishwashers that need hotter water usually boost temperature internally. While performing water heater troubleshooting, aim for settings that keep your family safe and comfortable. For broad efficiency and safety context, see:
Natural Resources Canada – Heating and Cooling Systems
Health Canada – Carbon Monoxide and Home Heating Safety
Preventive care that reduces future water heater troubleshooting
Annual maintenance you can plan
Electric units
• Flush annually (or semi-annually in hard water regions).
• Inspect and replace anode rods every 3–5 years; more often with softened water.
• Check element and thermostat connections for corrosion.
Gas units
• Clean burner assembly and check thermocouple/thermopile.
• Inspect venting and combustion air pathways.
• Test temperature/pressure relief valve for function.
Tankless models
• Clean inlet filters quarterly.
• Descale heat exchangers annually (more often in hard water environments).
• Verify condensate drainage on condensing models.
Plumbing details that matter
Mixing valves and balancing
• A tempering valve blends hot and cold for consistent delivery and anti-scald protection.
• If some fixtures run hot and others lukewarm, balancing valves and recirculation loops can help. Addressing these details dramatically cuts the need for water heater troubleshooting later.
Recirculation and wait times
Long waits for hot water waste energy and time. Options include on-demand recirculation pumps and smart controls that learn your routine. These solutions complement water heater troubleshooting by removing chronic “no hot water yet” complaints.
Hard water and scale management
• Install a scale inhibitor or water softener where minerals are high.
• Scale acts like insulation between the heat source and water, driving repeated water heater troubleshooting for temperature and noise complaints.
When to stop DIY and call a professional
• Any smell of gas, sooting, or visible scorch marks
• Repeated tripping of high-limit switches or breakers
• Leaks from the tank body (not a valve or fitting)
• Error codes that persist after a simple reset
• Electrical tests you’re not confident performing
A licensed technician from AOBUTEC – HVAC will take your water heater troubleshooting further: combustion analysis, electrical diagnostics, venting checks, flow and pressure measurements, and a safety sweep that proves the system can run reliably.
How AOBUTEC – HVAC approaches diagnostics
We start with your observations, then move through a structured sequence: power or gas verification, control status, sensors and safeties, combustion or element performance, and finally flow, venting, and drainage. On every water heater troubleshooting visit, we document readings, clean and adjust where needed, and leave you with a short report and clear next steps. If replacement is smarter than repair, we’ll explain why in plain language and provide options that fit your budget and timeline.
Choosing repair vs replacement after water heater troubleshooting
When repair makes sense
• Electric units with a single failed element or thermostat
• Gas units with ignition component failures or dirty burners
• Tankless models with clogged filters or scale that responds to descaling
If the tank is sound and performance returns to spec after service, repair is typically the best value.
When replacement is smarter
• Tanks that are rusted or leaking
• Repeated lockouts tied to age-related failures
• Rising gas or electric bills due to declining efficiency
• Household demand has outgrown the existing capacity
Your completed water heater troubleshooting provides the data to decide with confidence.
Sizing and selection for the next unit
• Match capacity to peak demand (showers, laundry, dishwasher).
• Consider recovery rate (tanks) or flow capacity (tankless).
• Plan venting, condensate, electrical, and gas supply details up front.
• Think ahead about maintenance access so future water heater troubleshooting is faster and cleaner.
Why Choose AOBUTEC – HVAC
A reliable hot water system starts with methodical setup and ends with proof—numbers that show it’s working as designed. AOBUTEC – HVAC brings a measure-first mindset to every water heater troubleshooting call and every installation.
What we deliver on every visit
• Clear, step-by-step diagnostics that move from simple to advanced without skipping safety
• Descaling, flushing, and cleaning that restore heat transfer and quiet operation
• Gas and electrical tests documented for your records
• Venting and combustion checks that protect your home
• Right-sized replacement options when repair no longer makes sense
• Respectful scheduling, clean work practices, and tidy leave-behinds
Make hot water predictable again
Hot water shouldn’t be a daily gamble. With a calm, step-by-step approach to water heater troubleshooting—and a maintenance rhythm you can actually follow—you’ll restore consistent showers, steady dishwashing, and peace of mind. When a problem goes beyond quick checks, bring in AOBUTEC – HVAC. We’ll listen to your symptoms, test what matters, show you the readings, and either repair what’s fixable or replace what’s not—so hot water becomes reliable again, day after day.
Frequently Asked Questions
-
How often should I perform water heater troubleshooting if everything seems fine?
A quick seasonal check is smart: verify temperature settings, flush a few litres to check for sediment, and confirm safety devices. Preventive water heater troubleshooting now avoids emergency calls later. -
Can water heater troubleshooting fix lukewarm showers without replacing the tank?
Often, yes. Thermostat resets, element replacements, flushing, or mixing valve adjustments solve many lukewarm cases. Proper water heater troubleshooting identifies which fix applies. -
What’s the fastest first step in water heater troubleshooting for electric tanks?
Check the breaker and press the high-limit reset on the upper thermostat (with power off first). If it trips again, deeper water heater troubleshooting is needed. -
Is it safe to relight my gas water heater myself during water heater troubleshooting?
Follow the printed instructions if you’re comfortable and there’s no gas smell. If the pilot won’t stay lit or you see soot or scorch, stop water heater troubleshooting and call a licensed technician. -
How does hard water change water heater troubleshooting?
Scale causes noise, slow heating, and temperature swings. Flushing and descaling are key parts of water heater troubleshooting in hard water regions, and a scale inhibitor may be recommended. -
Do tankless units need different water heater troubleshooting steps?
Yes. Minimum flow, inlet screens, gas supply, and descaling are central. Many tankless “no hot water” calls resolve by cleaning filters—an easy water heater troubleshooting win. -
When should I replace instead of continue water heater troubleshooting?
If the tank leaks, if error codes persist after proper service, or if performance can’t return to spec, replacement is usually the safest, most economical choice. Use the results of water heater troubleshooting to compare repair vs replacement clearly.